Since the last time I took an exam, Oracle switched from Pearson VUE in person testing to online testing from your home/office. This page explains the process of buying a voucher and scheduling an exam. Some of the steps aren’t obvious, so I comment on those in more detail.
Remember to study before you buy the exam as your exam must be taken within 6 months of paying. See our Java 21 OCP Certified Professional Study Guide page for details!
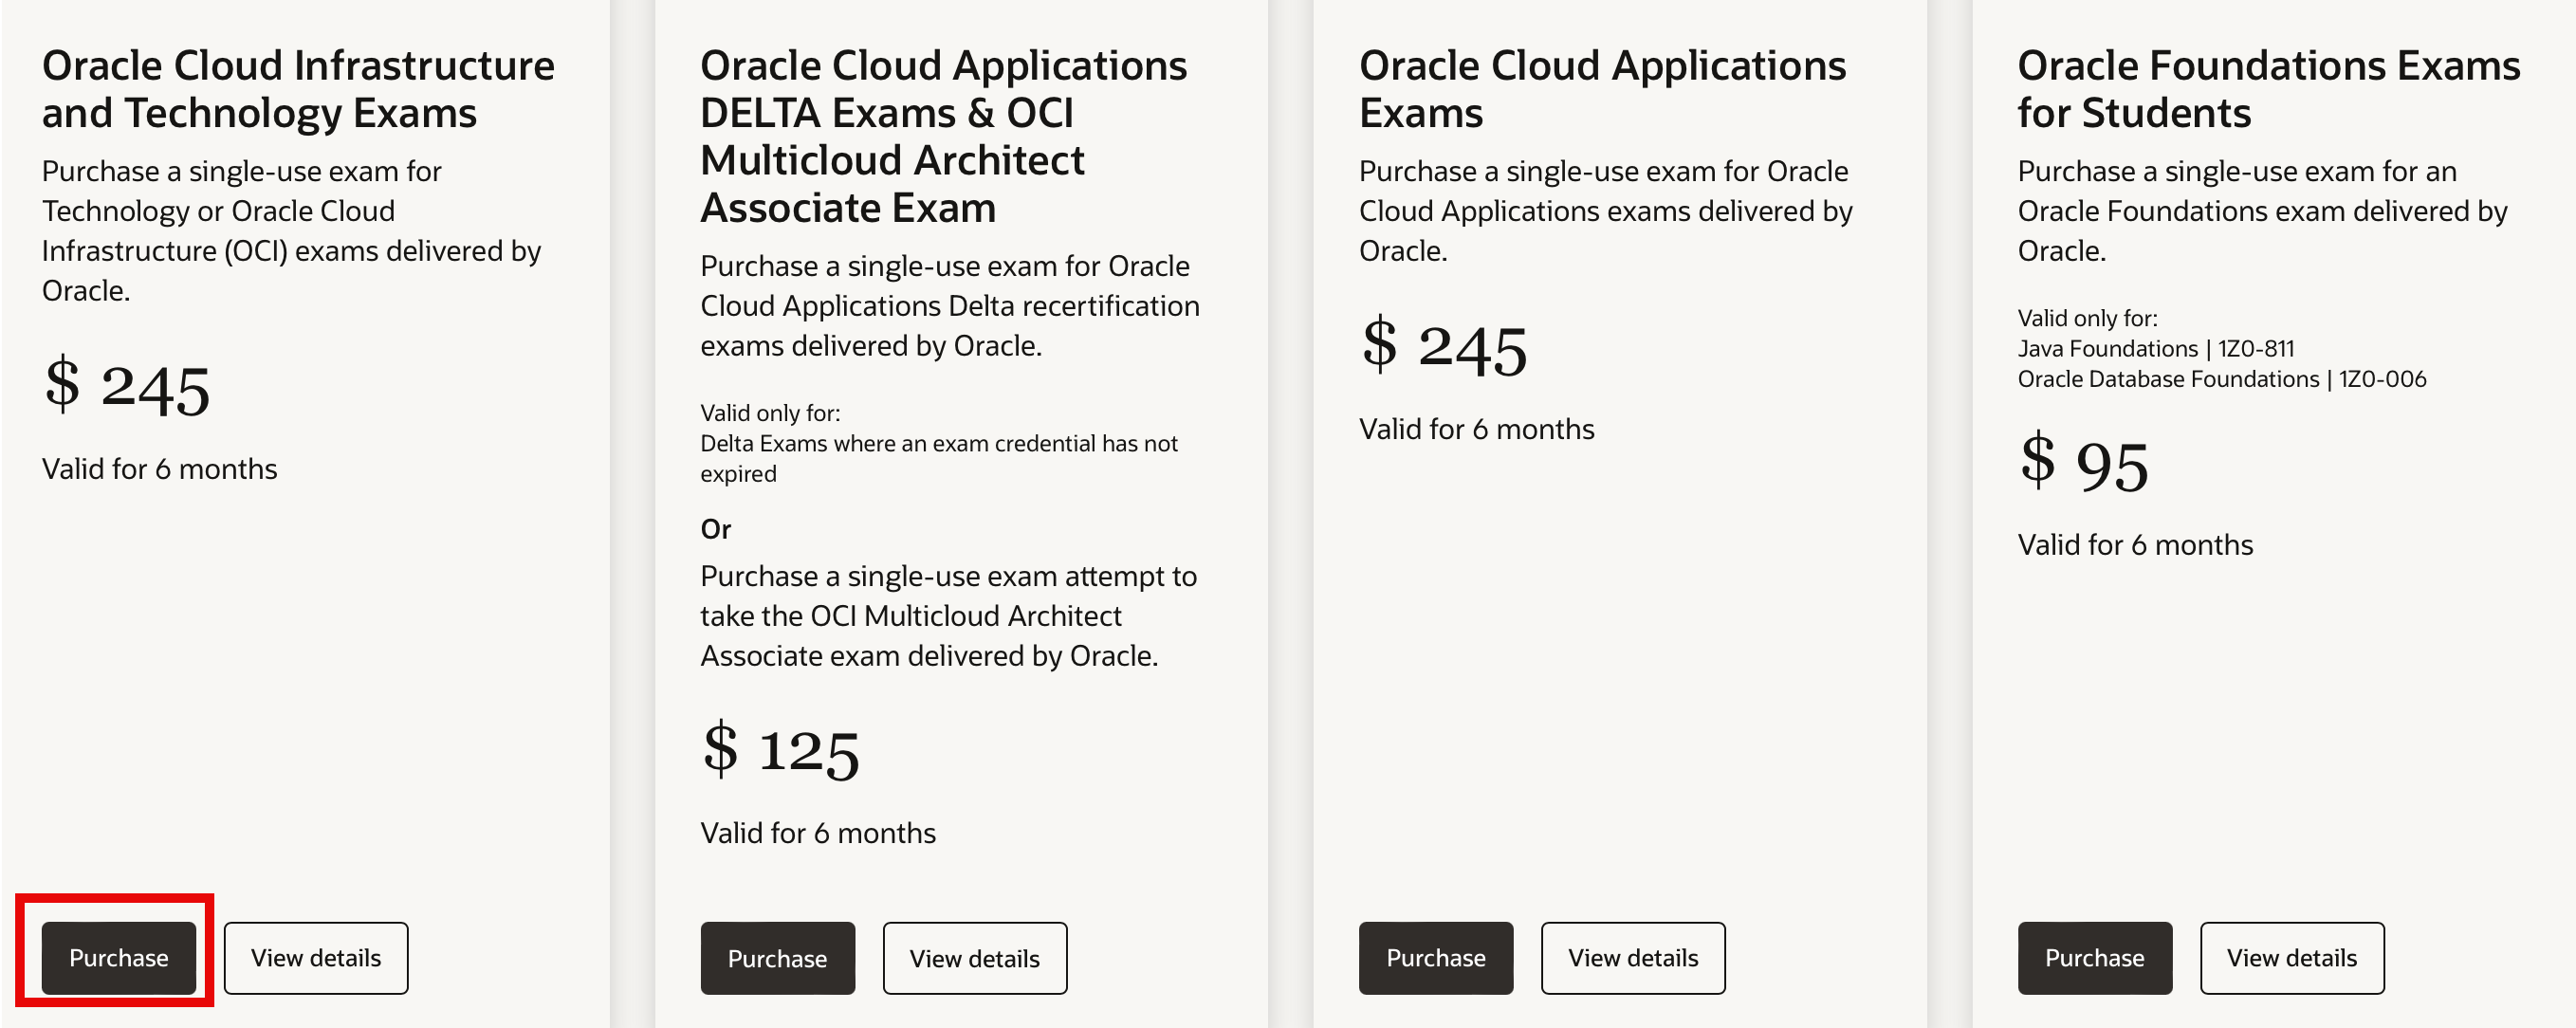
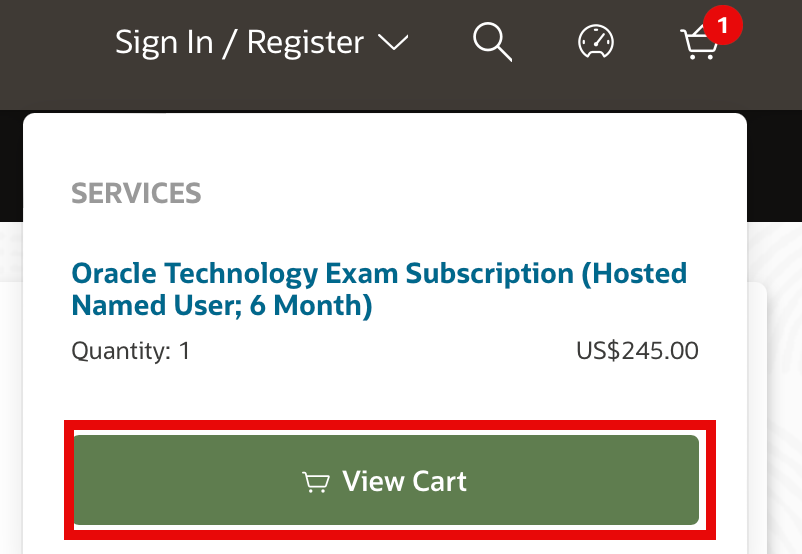
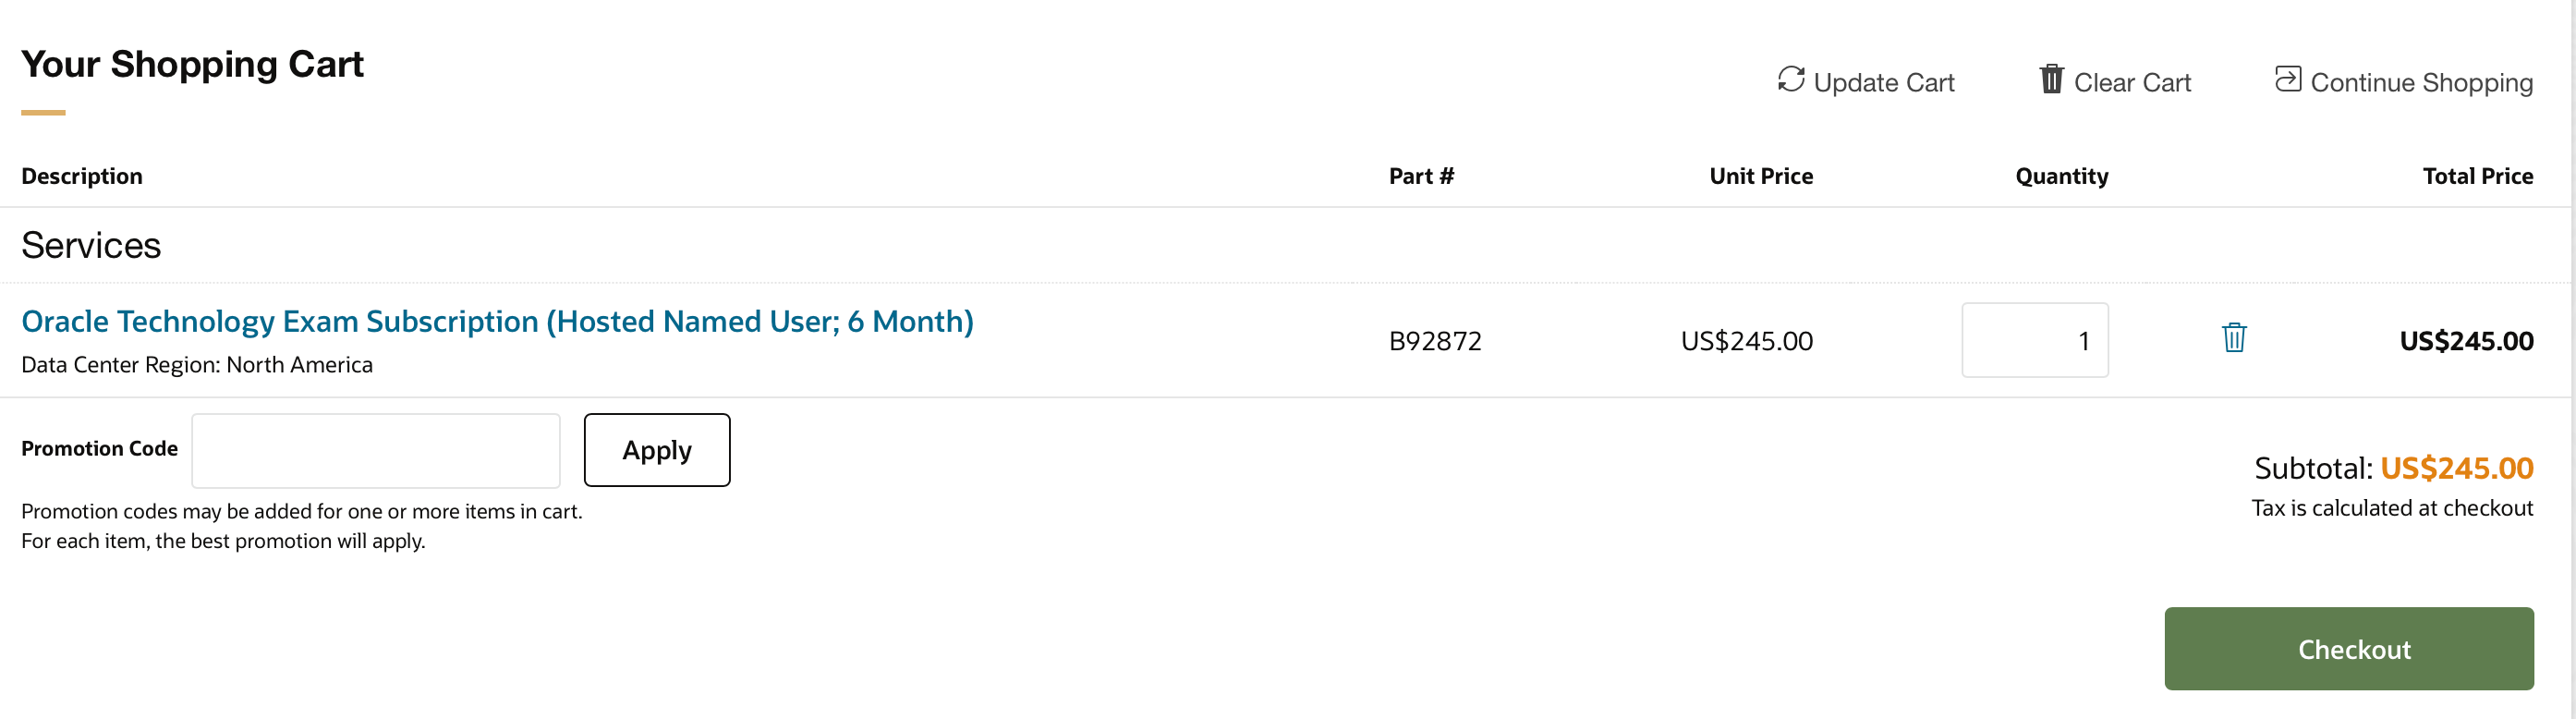
- Part 1: Paying for the exam
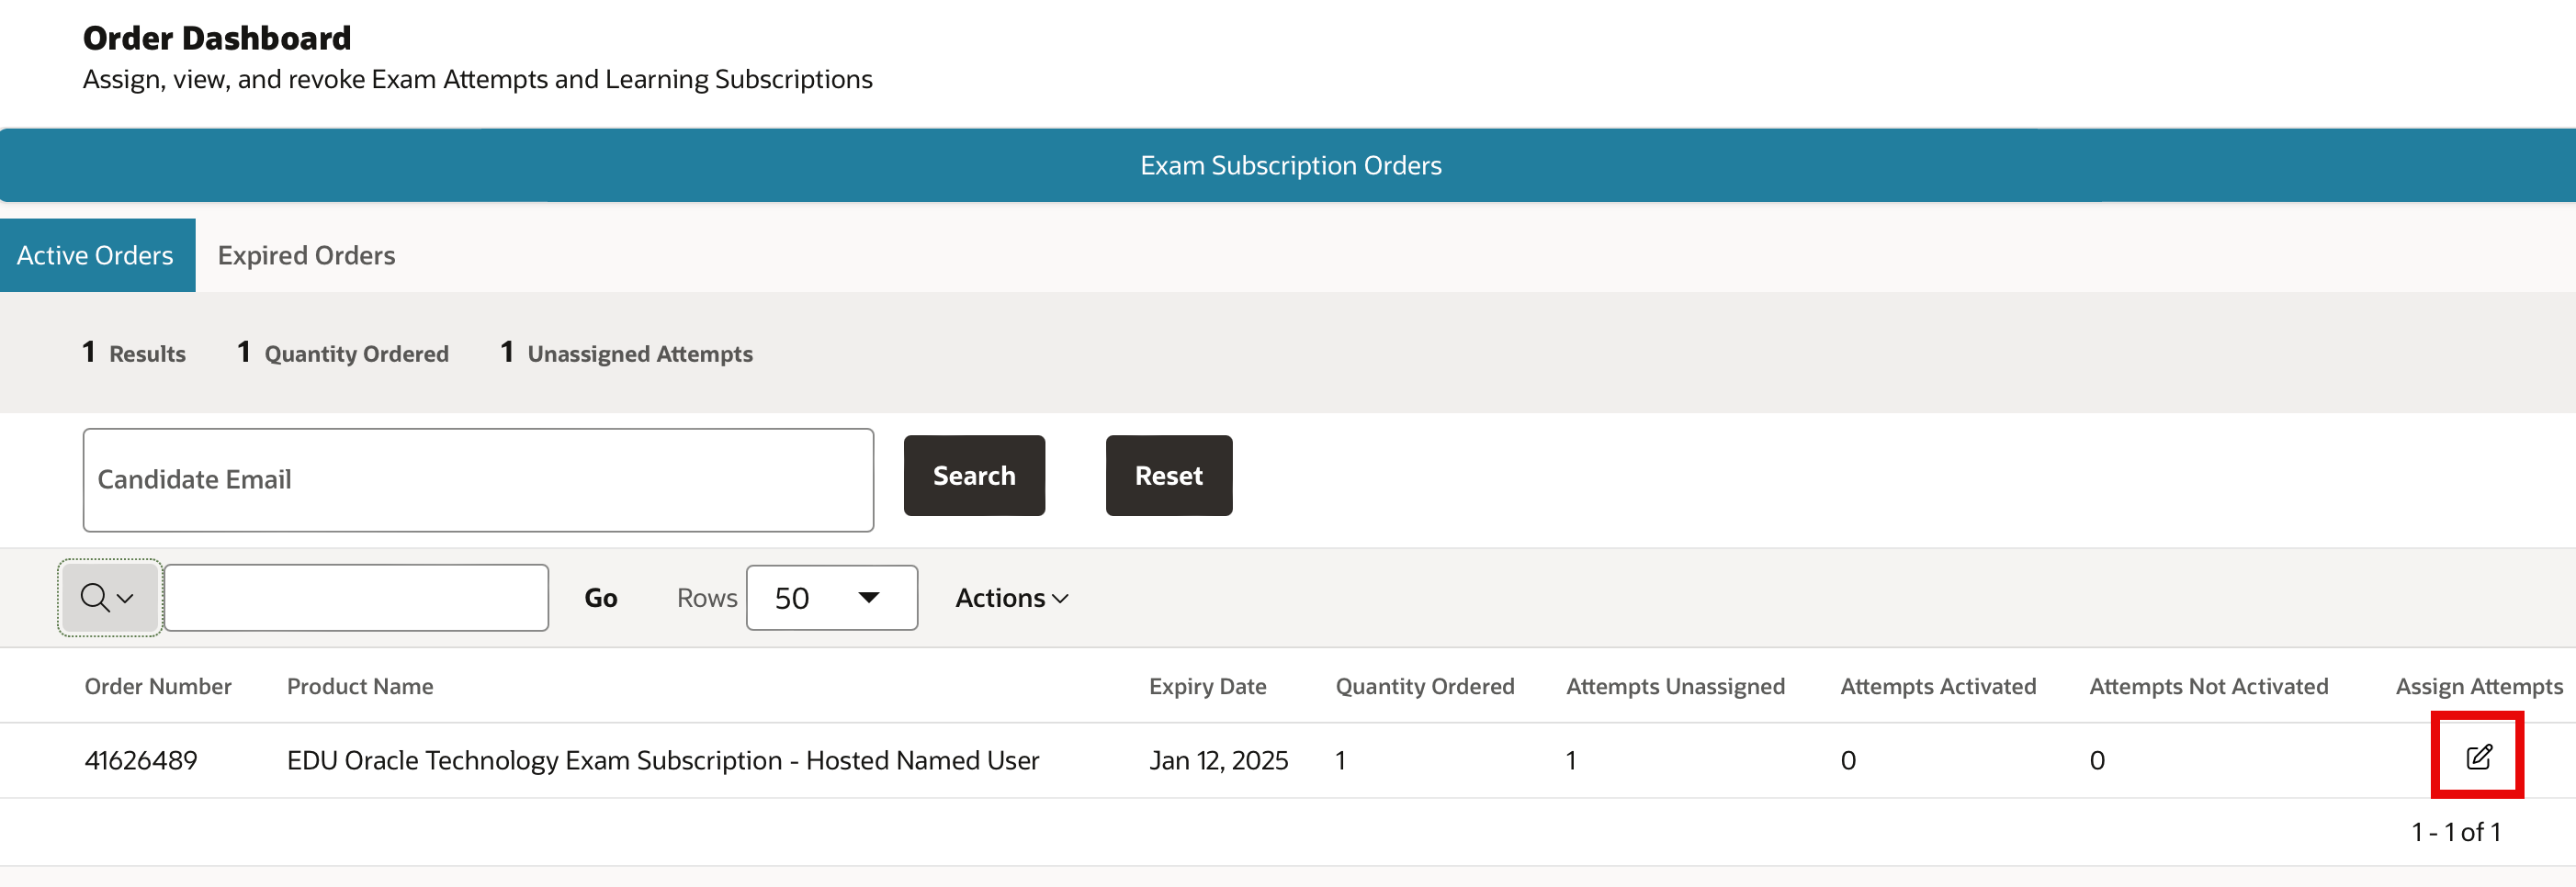
- Part 2: Assigning the exam attempt
- Part 3: Scheduling the exam (you are here)
Step 1: Sign up for the exam!
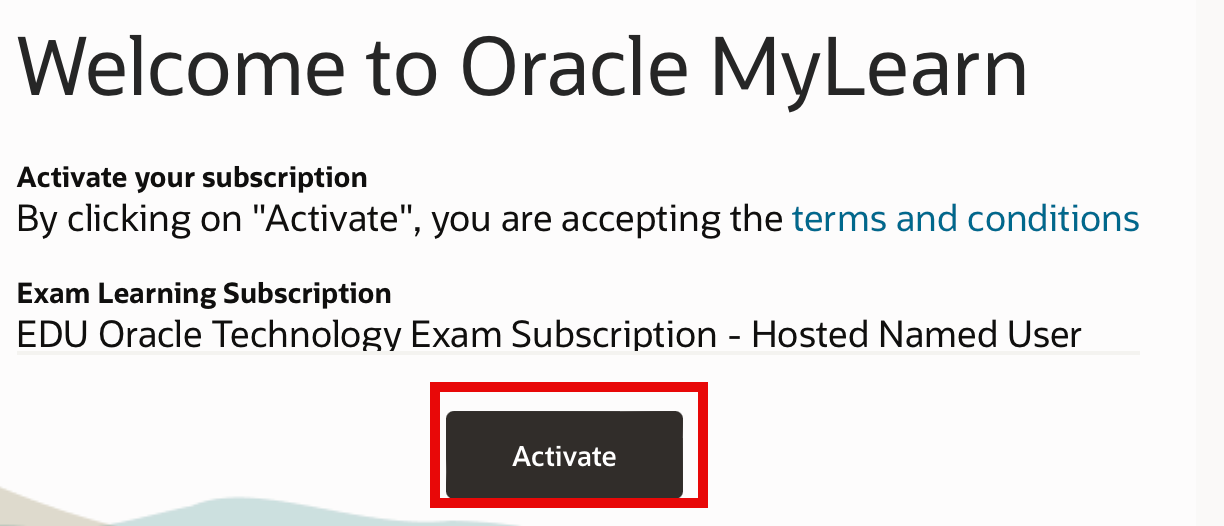
To sign up for the exam with your voucher go to the Java 21 page on MyLearn. (or whichever version of Java you want to take the exam for.) You get prompted to activate your “subscription” (it’s still an exam attempt misleading called a subscription.
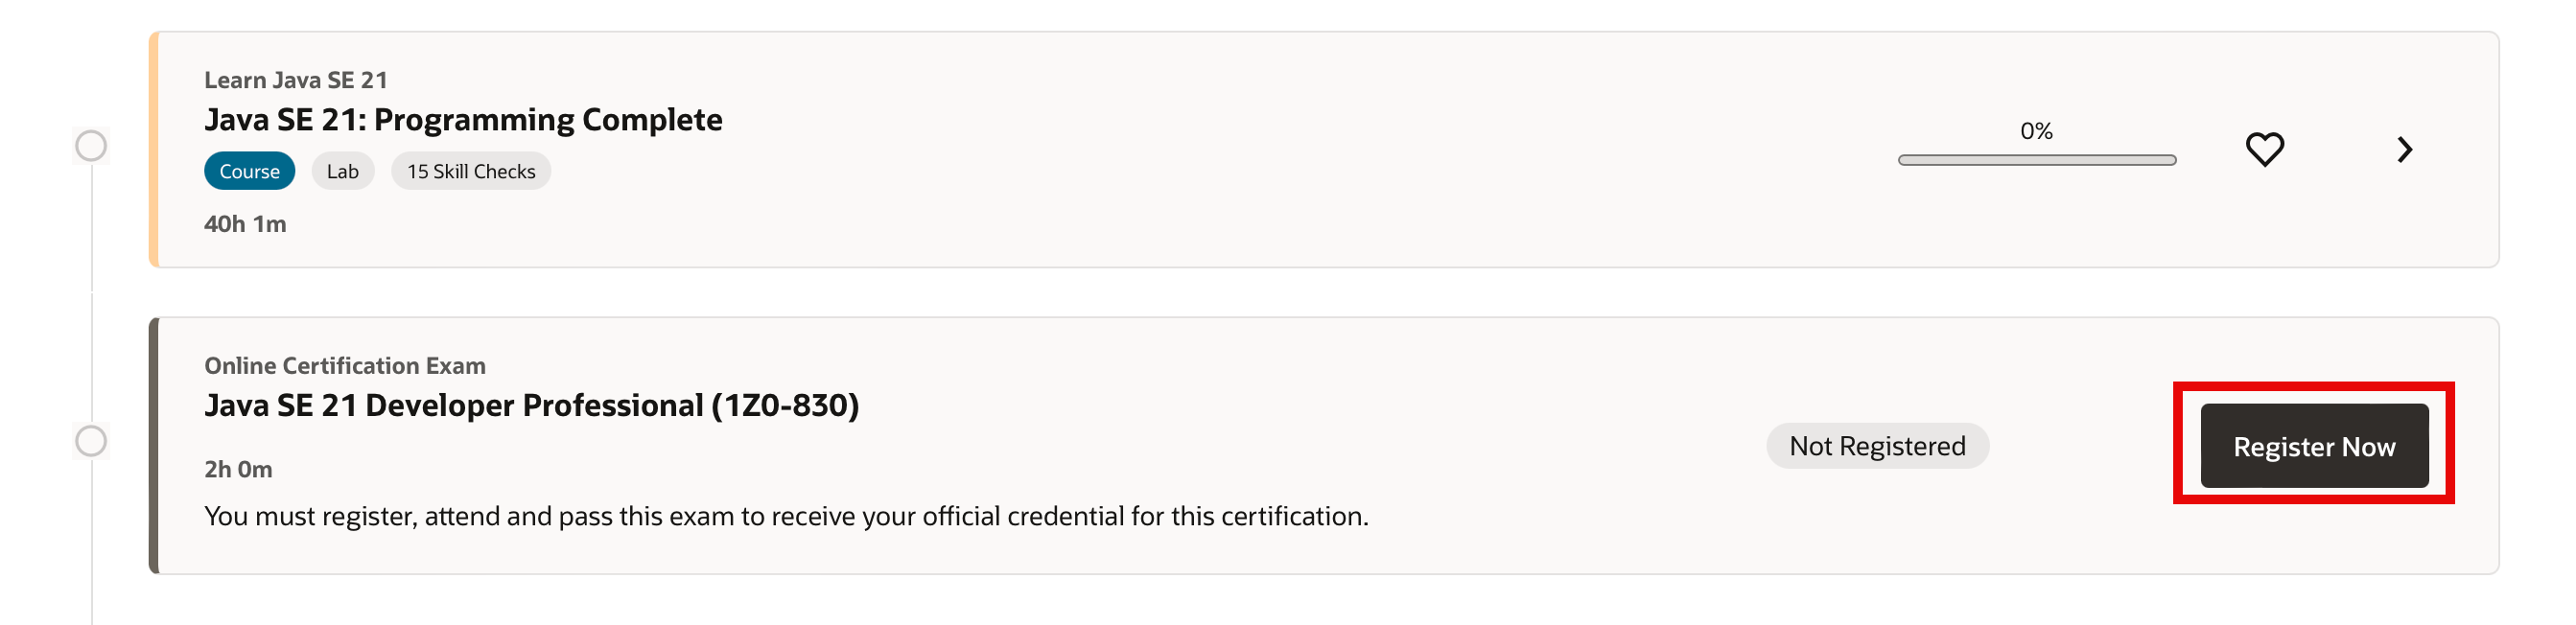
I chose to skip the option about personalizing my experience on MyLearn. Then you get to the page you want. Scroll down and choose “Register Now.” Ignore the course. It’s expensive and you haven’t bought it. Luckily, you don’t need to and can register for the exam.
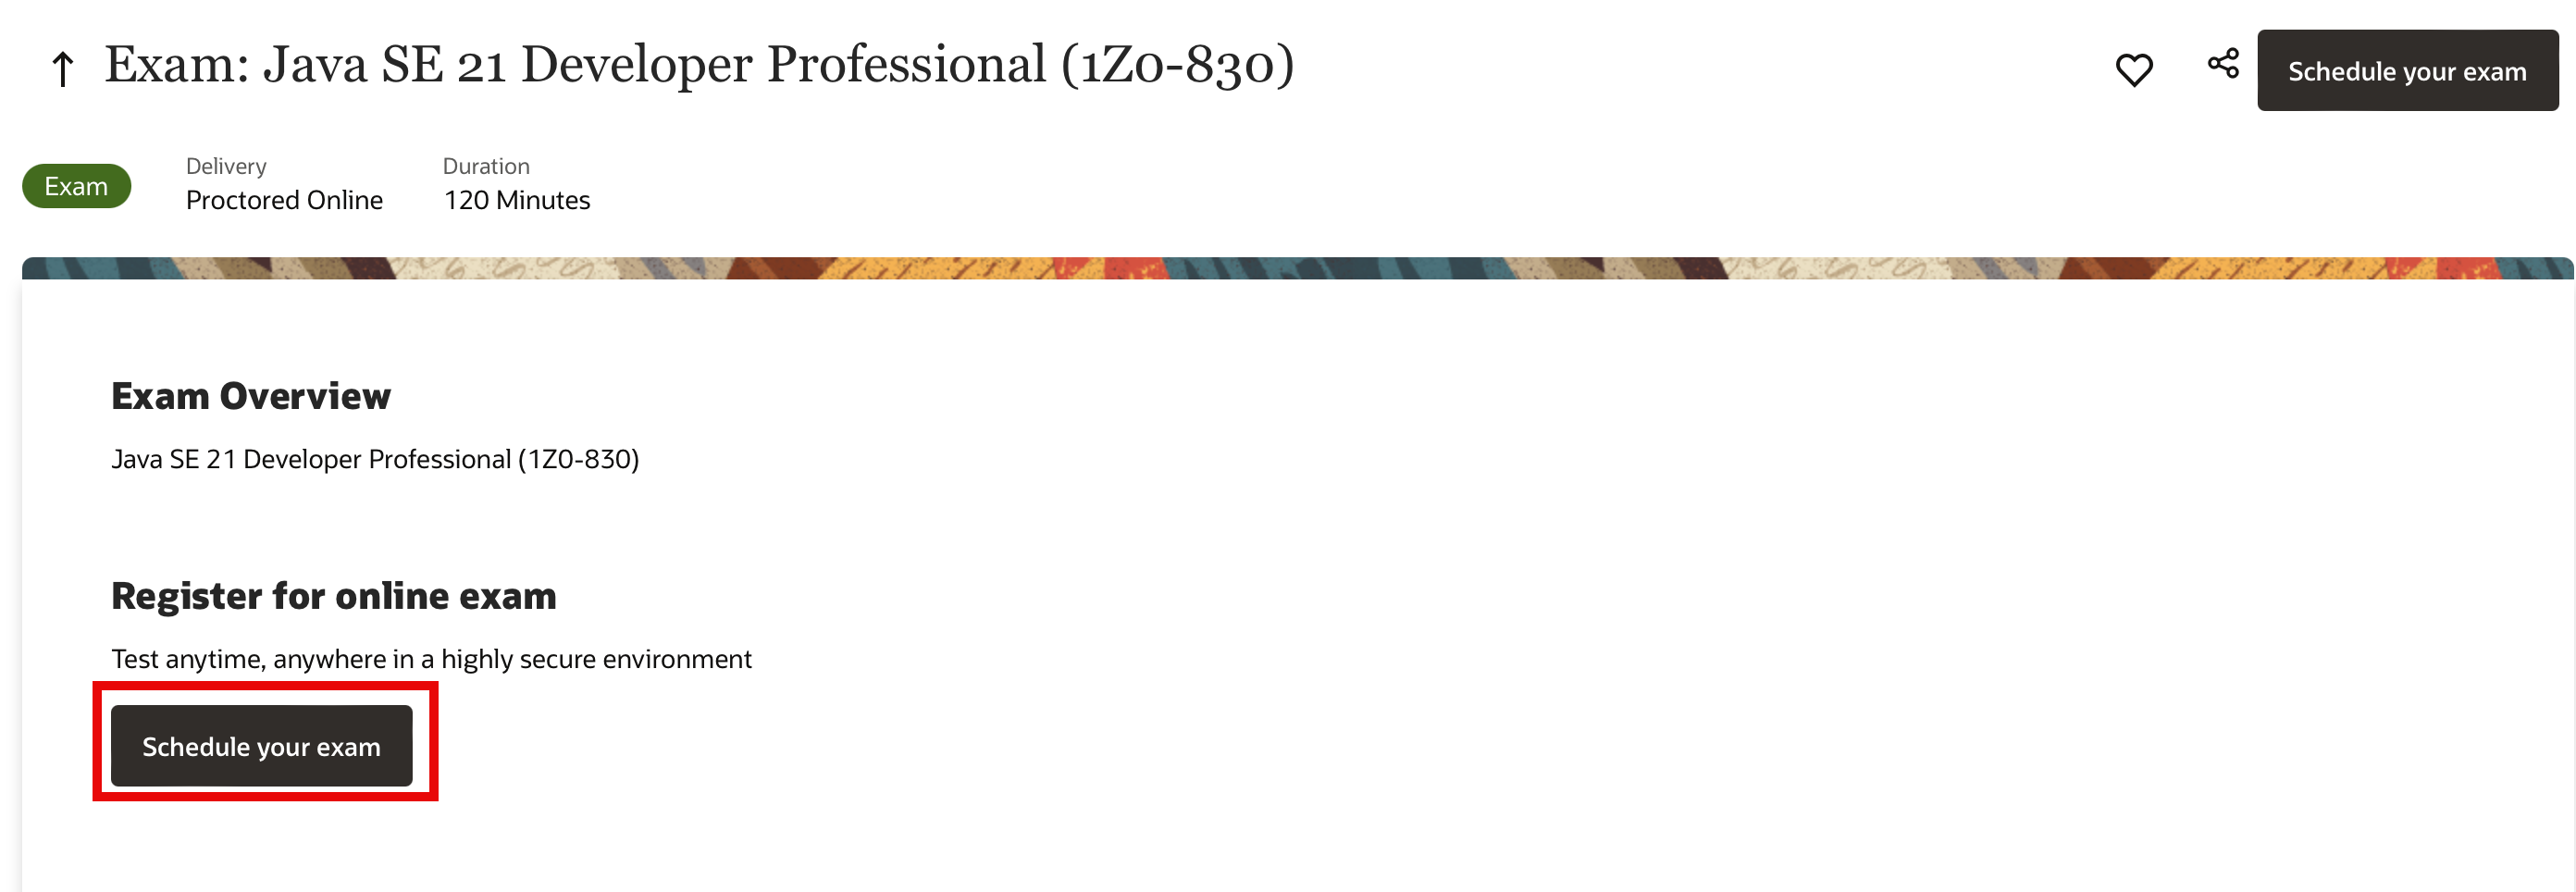
You see the exam name and timing. All exams are proctored online. You can click either “Schedule your Exam” option.
Also on this page is a summary of what you need for the exam. it’s not thorough. For example, it tells you that you need a computer with a mic and webcam, but not that you need admin access. (Don’t use a work computer). They provide the details later on a webpage.
The detailed text before the schedule page is:
- Computer – Use a personal desktop/laptop that has a reliable internet connection, microphone, and webcam.
- Id – Ensure that you have your government-issued ID for verification at check-in. The ID must match exactly first and last name used for exam registration. Have two forms of acceptable IDs available if additional validation is requested.
- Testing space – Checkin is 30 minutes before. You must not have access to any mobile devices, watches, other electronics, materials, books, screens, or anything else deemed unacceptable by the proctor. You should be the only person in the room, no other voices should be heard, and you should not speak during the exam. Make sure you take the exam in a quiet room, free from distraction. Headphones and virtual backgrounds are not allowed.
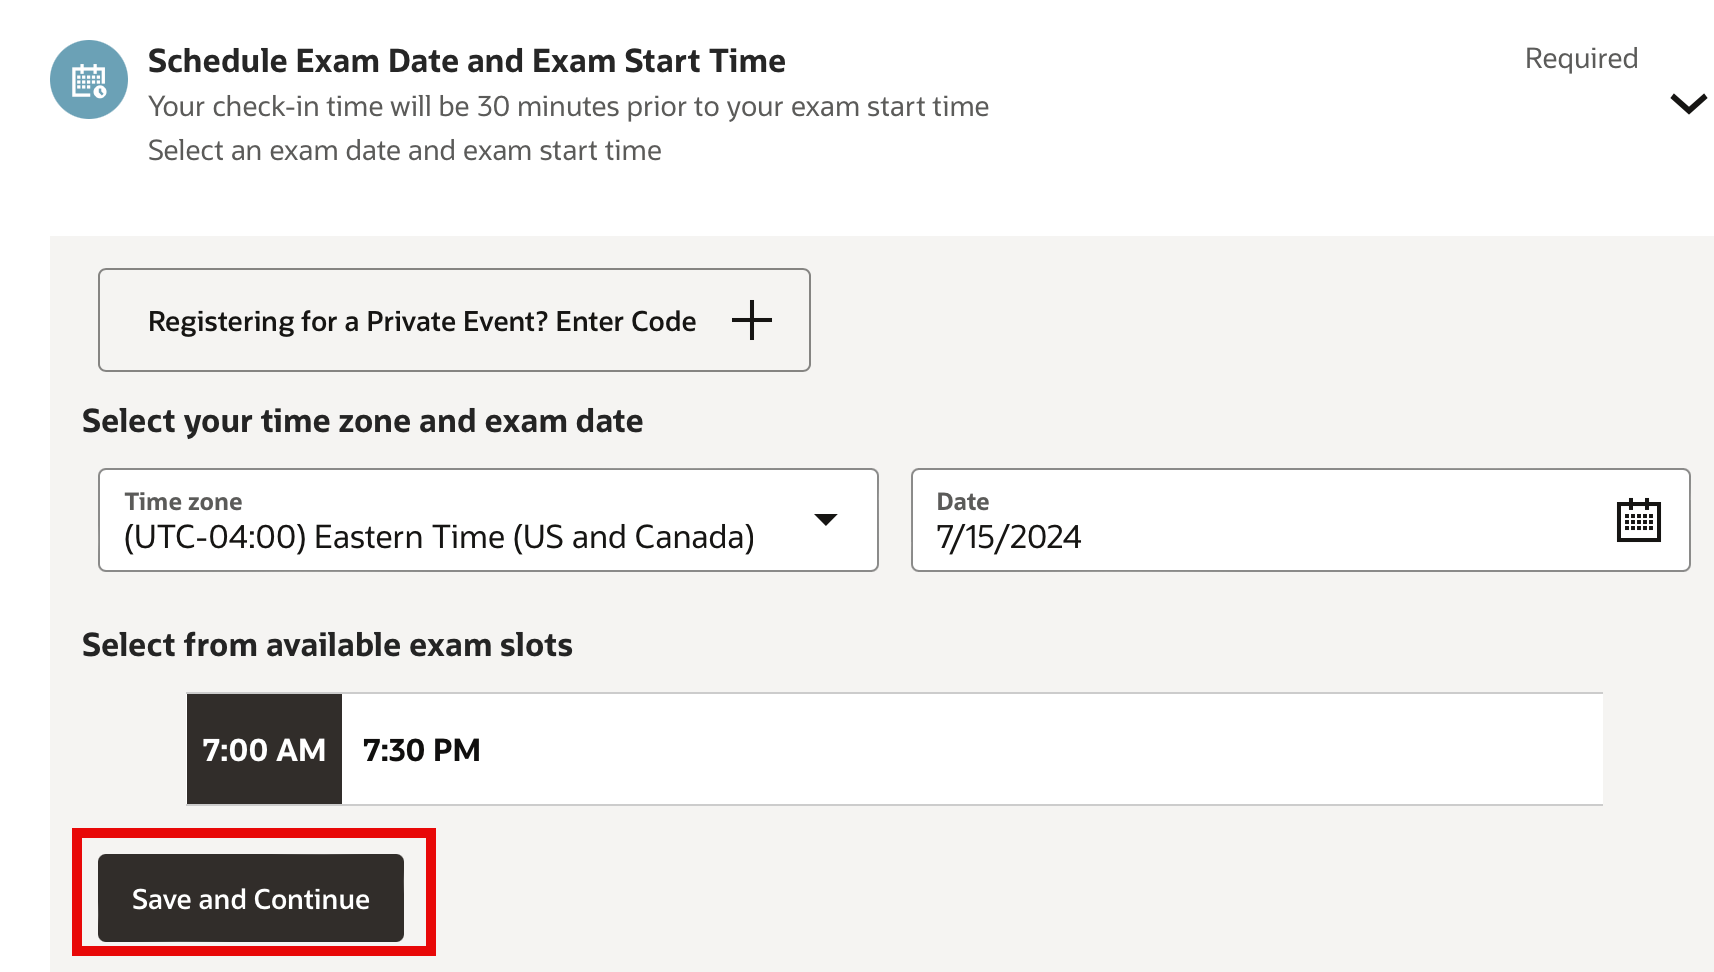
Step 2: Schedule the exam
Choose your time zone and the desired date for the exam. After you choose the date, it shows you the available times. There seem to be six start times per day (NYC time: midnight, 4:30am, 7am, 11:30am, 3pm, 7:30pm). Some days slots are full. Note that the exam is not given on weekends and options are available roughly two months out.
Then click “Save and Continue”
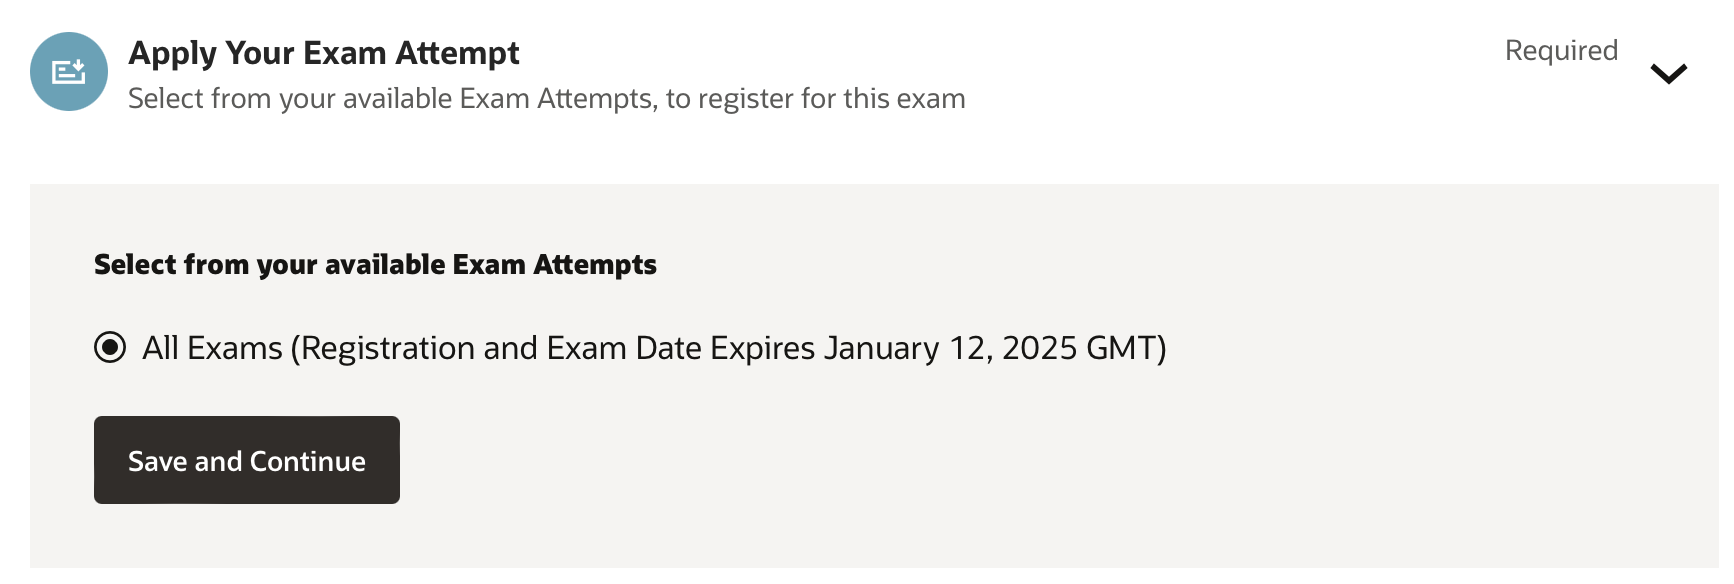
Select the one radio button that is an option and “Save and Continue” again
Then enter the name on your id and a contact phone number if there is a problem during the exam. Finally, agree to the terms and conditions. Which include a link for the details for the computer and id requirements. Then you get to schedule the exam.
Step 3: Learning path for validating system
Oracle provides a learning path to validate your setup. This walks through downloading the secure browser for your operating system. It’s called “Lockdown Browser OEM”. Good to know so you can delete it after the exam. The learning path took about 10 minutes to go through. It closed most of my applications, but oddly not the Chrome browser that I launched it from. (I was watching Hulu in the background in Chrome during the test)